PAGE 1 | PAGE 2 | PAGE 3 | PAGE 4 | PAGE 5 | PAGE 6 | PAGE 7
September 22 2023
Want to learn how to draw cartoons? Without paying anything? Then you can now learn this stuff over at my YouTube channel.
February 24 2022
Since writing my article about camera magapixel madness there have been lots of development and advances in sensor engineering. So I figured it would make sense to add an update at the end talking about that. And I did.
March 4 2021

Since writing my article about Masked Lapwings I’ve seen the birds return to nest on our block about a dozen more times (often twice in a season). Which has given me a lot of time to observe them. And I’ve noticed that not all the parenting I’ve seen from the birds matches my descriptions in the article. So I added a bit at the end.
And the picture above is of a Masked Lapwing chick that had only hatched about half an hour earlier. Cute eh?
September 20 2020
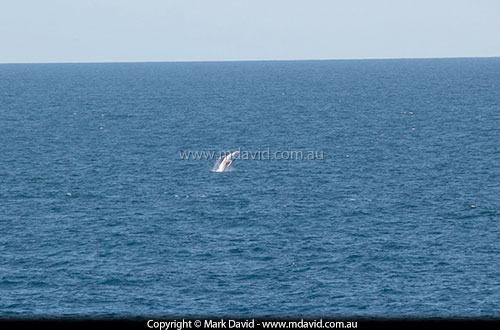
Here is a picture of a breaching Humpback Whale. Note most carefully that this image is extremely boring, because the whale was too far away to get a decent shot of it.
I took dozens of photos as bad as this one, but still managed to get a nice result in how I presented them. Here’s how.
September 18 2019
Wow! It’s been another long stretch between updates.
But I’ll be honest with you. I don’t list every single update to my website here. I mean, I’m often tinkering with spelling or trying to find better ways of saying things and I don’t see the need to go on about that kind of stuff here. But sometimes I add another page and so this is where I talk about it.
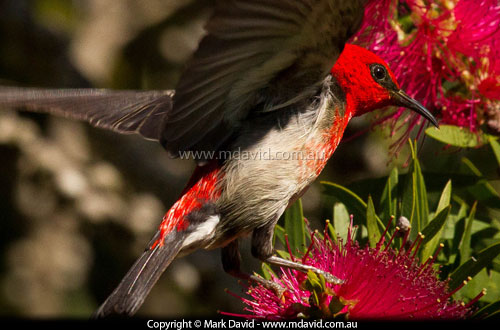
I was out the back of my place where I’ve planted a whole lot of Aussie bottlebrush trees for my Aussie garden. Those flowering bottlebrush trees have attracted a real lot of honeyeater birds, and I noticed that I was relying on some very high ISO settings to photograph them, despite the bright, late-morning sunlight. So that was the subject of my page right there. Or rather, right here.
December 9, 2017
Damn! Has it really been that long since I last added something to this website?
I haven’t been completely slack, though. I’ve been picking over it, correcting spelling mistakes and mucking around with the ways I explain things, hopefully to make things clearer. But apart from that this site really has been a bit neglected lately.
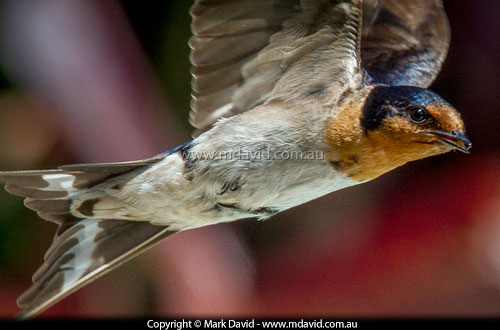
Well, today that changed. I’ve been taking photos of Welcome Swallows, like the one in this shot, zooming around mid-air feeding their youngsters. It all happens in the blink of an eye but a digital SLR camera makes photographing that kind of thing easy. Yes, seriously it actually does. You just have to know how to set up your camera. So I explained it.
April 16, 2016
With cameras, it really is possible to talk forever about all the technical stuff. But that’s not making us better photographers. It just makes us pedantic photographers.
So I was adding some new material to my article on APS-C versus full frame, and I found myself banging on and on and on about some stuff that really wasn’t all that important. I even ended by saying that I didn’t think it was all that important. So then I figured, if it was just going to waste all my time writing it, all your time reading it and it wasn’t even important, then why even include it?
So, using the awesome powers of a truly marvellous thing called a “Delete button” I edited my additions down to make them shorter and important, rather than longer and unimportant.
You’re welcome.
January 26, 2016
I recently realised I had a problem. You see, my theory is that cameras aren’t really all the complicated. At least not once you get past the basics. So then if that was the case, how could I justify the need for a website with so many pages of articles to explain everything? I mean, the sight of all those article to read doesn’t exactly make things look simple.
The thing is — I still swear by my original conviction: that cameras aren’t all that complicated, really. But you do need to grasp the basics. And so I figured if anyone wanted to make sense of the subject then they really should be pointed to my “getting started” article. Because that’s the bit which is most important.
So I got all designy and put a big blob of grey colour to highlight that article on the photography home page. To really make it stand out. I’m not getting rid of all those other articles — but I really want people to understand that “getting started” stuff most of all. Because it all really is much easier once you get past that.
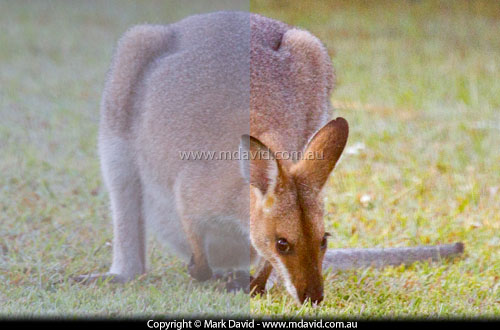
Oh, and I did a new article too. I saw a wallaby outside a window one morning and the light was really bad. And the window was really dirty. So the shot I got was pretty bad. But using a RAW editor I was able to clean it up quite a lot. So I figured I could write about what I did. You can find it here.
June 29, 2015
What a can of worms this “responsive web design” thing is. Responsive web design is the formatting of a website to adjust itself automatically to work on any size screen. And it’s easier said than done.
No, let me rephrase that. It’s easy enough to do. Just tricky to make it look the way you want all the time.
The way most people do it, is to break up your web page layouts into blocks that always appear in a certain order. They can appear in a horizontal line across a big screen or stacked vertically down a narrow mobile phone screen.
Resize your browser window and everything reshuffles itself so it will always fit the screen.
That works pretty well, but if your background is in print design like mine is, it takes some getting used to, watching your carefully designed layout adopt a mind of its own. Pictures can move around the layout and position themselves to where you don’t think they work best. Which means that after you apply a responsive style to a page you really need to test your stuff a lot.
Which is something I haven’t done yet.
So I almost certainly have pages where I’m talking about a picture “at right” while the picture has actually ended up being on the left, or below or nowhere it. I’ve fixed a few of those but I doubt I’ve caught all of them yet.
And that’s not a good look.
So, with the new responsive layout applied to almost the entire nature and photography sections now, I’ll soon be going through it all with the aim of spotting and fixing those kinds of silly mistakes.
June 7, 2015
Pretty much all of the photography section has now been converted to a layout that reshuffles itself to fit the size of the screen its on. And the text should automatically be a size that’s easy to read too. But I’ve made it so you can still zoom in on tablet/phone screens if you want. I hate the way how some designers block that pinch/zoom functionality in mobile-specific websites. If people want to zoom then I say, let them zoom.
I’ve been doing a bunch of the ‘easy-to-update’ pages too. Including the page you’re looking at now. Because it was kind of nice to make some quick progress before I settled back down to the slower stuff.
You see, when I did my feature article pages about nature and photography I was thinking more like a print designer than a designer for the web. Modern web code allows you to do that. You can make your site look pretty much any way you want. And so I designed my pages with lots of different styles and slightly different layouts and image sizes and so on. The problem was, it’s difficult to make so much variation in layout reshuffle itself according to the new ‘responsive’ way of doing things. Well that’s not entirely true — it’s easy to enough to make everything reshuffle but not in a way that you’d be able to read.
So that’s why I’ve been taking so long. I can’t just apply a new style sheet to my site and be done with it — I have to look at every page in the site and make sure it resizes/reshuffles properly. One bonus from that is that the new code is now even leaner than it was before, so that’s going to make it easier for computers as well as your phones and tablets.
You know, when I think about it, the code is now probably only about a quarter of what it was before I started hand-coding, while actually providing the same amount, or more, of content. First us web designers built sites that were bloating out due to the availability of broadband. Now we’re madly optimising and making our sites responsive so they’ll be comfortable on phones. Your guess is as good as mine what the next web trend will be.
June 5, 2015
Almost all of the photography section has gone responsive now. It was a bigger job than I thought. Because when I originally did all those articles I never guessed this whole responsive thing would happen. So I’d made everything for big screens.
But you should now be able to read the photography pages on a big screen or a tiny one and you’ll get exactly the same content on either platform. The cool thing is that I didn’t have to degrade the site or dumb it down. It’s the same content as I had before. The whole responsive thing kind of works better than I thought it would. In fact, the only things I took out during the conversion were one or two images that I didn’t think were necessary and one or two pretty bad jokes.
May 11, 2015
The new thing in the interwebs is responsive websites. What that means is web page layouts that adjust themselves to any kind of screen on any kind of device. Because more and more we’re using mobile phones and tablets to browse the web.
So we can’t have websites that only work on a desktop computer any more.
I thought I could bury my head in the sand about this. I mean, there are bugs outside that really need to have a macro lens pointed at them. That’s right. I’m only thinking of what’s best for them.
But what the heck. I’ve started making my site responsive too.
Now I’ll stress that my site was always only meant to have about half a dozen pages. I sort of got a bit carried away with it though and so now it has hundreds of pages. I think. So it’s going to take me a while to do it all, due to the fact that I hand-code the whole lot. So for a while there, some pages will be responsive and others won’t. How fast I can get the whole site done depends largely on how soon I can get my head around how to do it, and also on how many photogenic bugs are luring me back outside.
So as of today, only the home page has been changed. And once I’ve tested it on more devices I’ll probably keep mucking around with the code to improve it. But like I said, eventually it will be the whole site. Folks tapping on a tiny mobile phone screen won’t have to squint and pinch and squeeze to read my site any more.
Because I’d never want it said that I wasn’t responsive.
March 13, 2014
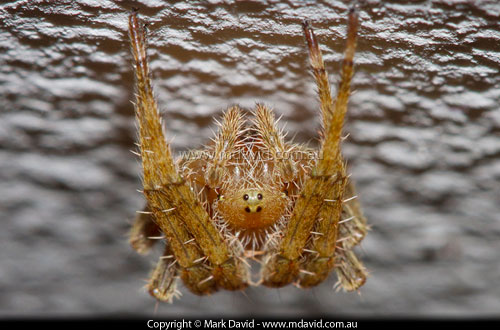
You’ve just got to love macro photography.
A tiny dot on the ceiling turned out to be so much more interesting the moment a macro lens got near it. That’s the cool thing about tiny stuff — it tends to surprise us with its details.
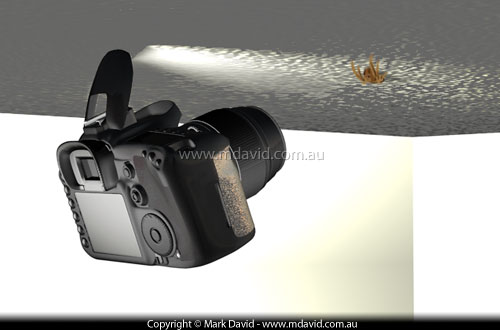
So you would have guessed by now that it was a spider. But to get that rough-textured ceiling effect was 10% experimentation and 90% luck. You see, after trying a bunch of difficult camera angles I finally just held the camera and flash right up near the ceiling. And once that pop-up flash almost touched the ceiling the angle of its light showed up every tiny bit of texture in the paint, adding even more interest. (See the 3D graphic simulation below).
So there was no fancy equipment. Just the built-in flash, combined with the 100mm macro lens on my Canon 7D. So next time you see a bug — any bug — check it out with a macro lens and see if there are any interesting details.
March 11, 2014
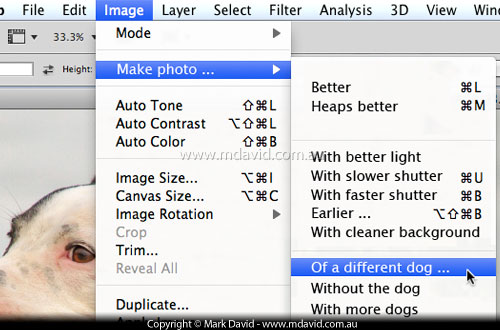
There’s an old saying on film sets which says, “Fix it in post”.
What that means is, if you can’t get things right while you’re filming, then get some computer guy to fix it later in post-production.
And what most people don’t realise is, it actually takes a lot of experience to know when it’s best to fix it in post. More often than not, if you can fix things at the time you take the shot, then not only will be it less work overall, but you’ll get a better result too.
A lot of still-photographers take their shots like someone who can always fix things in post. While programs like Photoshop are amazing, there’s a limit to what they can do. And why would you want to do all that fixing up afterwards if it can be avoided by just taking your shot from a different angle, for example? Pro photographers will walk around a bit and see things from different angles and consider what’s in the background and shift things out of the way and only when all the problems are fixed, do they then start taking their shots.
So when you look through the viewfinder, ask yourself if there’s something you can do to fix in “pre”.
March 11, 2014
Here are some tricks for you folks who like to take a series of shots to stitch together later into a panorama.
With programs like Photoshop having special auto panorama stitching the only hassle is figuring out exactly which files are meant to be in which panorama. It can be tricky if you took more than one series of pictures of the same scene. So that’s where this trick comes in.
After taking a series of shots that I intend to stitch together, I’ll take a picture of the ground (or if I’m using a tripod I’ll take a picture of my hand). Because when I get back home, each series of shots will then be neatly separated from each other by those blank frames.
I also always take my panorama shots by starting at the left and panning to right. That way, when I see the files as thumbnails in my RAW software, they line up the way they will look after I’ve stitched them. It makes it much easier to see what I’m working on.
March 9, 2014
In this website I talk about ways of getting sharper images but sometimes you can get a better shot by deliberately allowing stuff to go blurry.
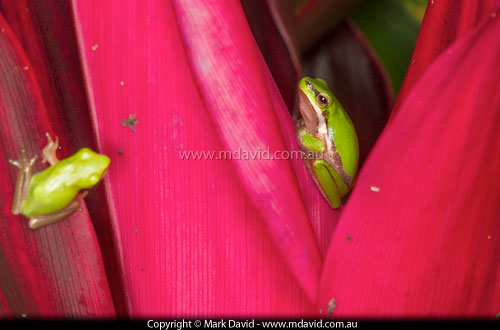
When I spotted these two tree frogs in a Pink Cordyline plant I saw that one was positioned deep inside a V-shaped formation of leaves. While that can sometimes be a bother, it can also make things more interesting.
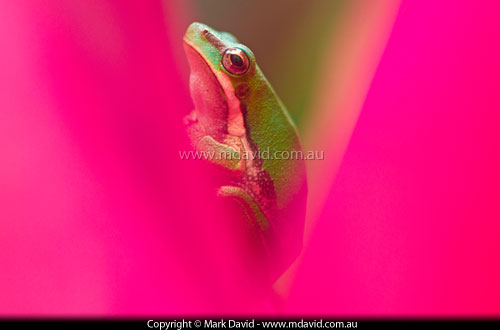
To get this next photo, all I had to do was get the camera much lower down, so that V-formation would start to loom up while I still maintained focus on the frog. Depth of field in macro photography is always tiny and so the effect was especially pronounced. The result was those pink leaf edges becoming wild smears of intense colour.
So remember — just like how you can contrast between colours, or between light and dark, you can also contrast between sharp and blurry. That’s right folks, blur is your friend too.
March 9, 2014
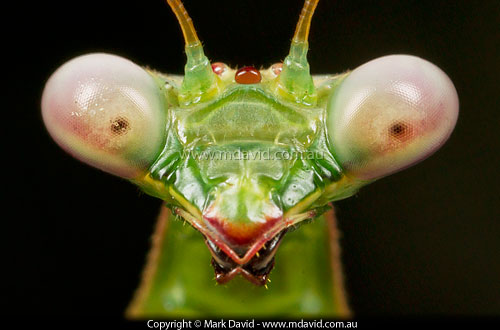
When you’re out doing macro photography, it’s tempting to only take pictures of whole insects, but if you come across something larger than your normal macro subject, then why not grab the chance to get right in close for an interesting detail. The head of this large praying mantis was almost as big as some of my other (smaller) macro subjects, so I just filled with the frame with it. I took some other pics too, moving back to capture the entire body like how I normally work, but I didn’t like those shots nearly as much as this one.
March 8, 2014
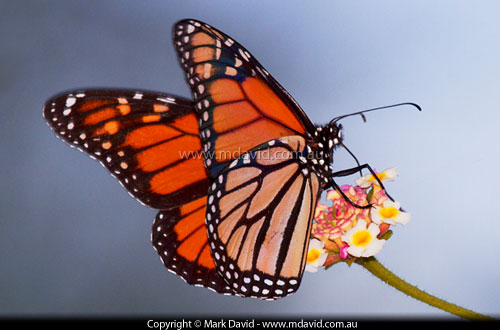
Telephoto lenses needn’t only be for distant stuff. Used at their closest focusing distance they can be mighty handy for macro work, especially with easily spooked critters like butterflies. Well okay, for boring technical reasons the 100-400mm lens I used for this shot can not actually be said to be doing true macro. But seriously, who cares about technicalities when all you want is a picture?
This Monarch butterfly was about 2 metres away when I took this shot. And the telephoto effect helped to make a nice soft background in ways which a regular macro lens couldn’t match and it still managed to capture heaps of sharp detail. So if you have a zoom lens, try zooming in as far as you can and see how it handles the smaller stuff.
March 4, 2014
It’s easy for us photographers to fall into habits. People who use the same lighting setup or rely on only one way of composing a shot are sometimes said to be taking the same photo every time.
But that doesn’t mean it isn’t handy to have one or two ways of working that you can always rely on. For example, if a critter I’ve never seen before suddenly pops into view in beautiful light then I never know how long the moment is going to last. So I’m not going to try to reinvent photography in my first shot. Nope, chances are that I’ll get a shot — any shot is better than none — using my saved camera settings. And once I’ve got that done, then I’ll start thinking about how I can do something different to get a better shot.
And then there are some times when I’m doing other types of photography. I’ll tell you right now, sometimes it can be quite technically demanding. So when I’m unsure about how I’m supposed to get the shot I often ask myself what I’d be doing if that subject I’m supposed to be photographing was a bird, or a wallaby, or a spider. And then I know right away how to deal with it and get to work.
The truth is, being able to master all of photography is like being able to master all of art. Or all of life. It’s not going to happen. But once you get a feel for how a camera works then you’d be surprised how many ways you can apply that knowledge creatively into other areas. In fact, there really are no limits. My camera doesn’t care if I’m not photographing a critter. So why should I?
March 1, 2014
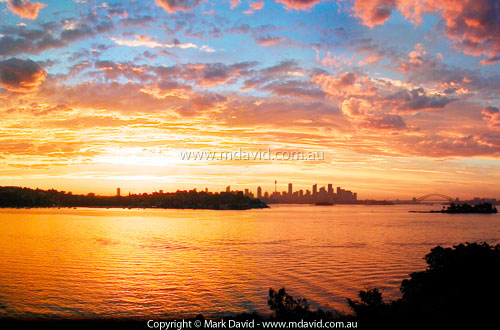
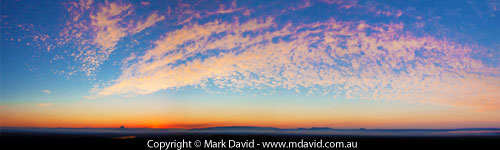
Sunsets are perhaps the ultimate example of photos not being able to match the real experience. I mean, have you ever heard someone say they chilled out with a glass of wine to watch a photo of a sunset?
Nope. So if you take a photo of one then you want everything working in your favour. Left to a camera’s auto settings, you could easily end up with a dud shot, but it’s not hard to capture the colours that originally made you stop and take notice. Just set your exposure for the sky and snap away. My new article explains how.
February 26, 2014
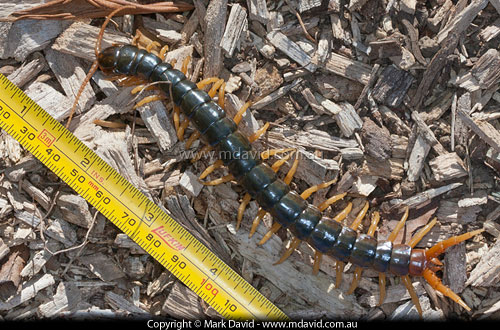
Sometimes macro photography involves taking shots of the not-so little. The first pic (above) is of a centipede measuring 6 inches (15cm) long. It was in my garden. This guy can pack a powerful venomous bite, thanks to a pair of very big fang-like things called forcipules under its head.
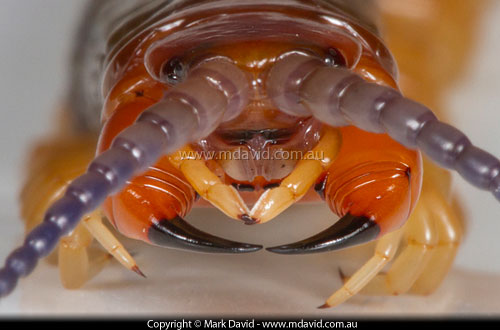
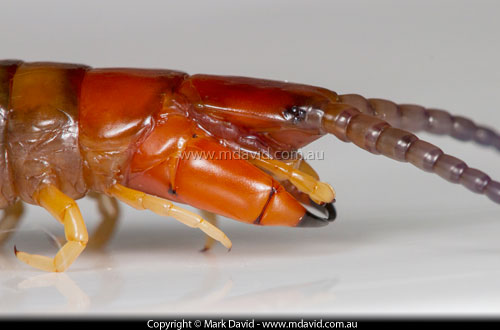
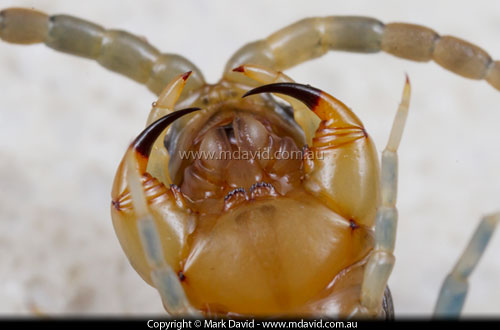
The next pics were taken of a much smaller centipede — only about 3 inches long. This time it had been nearly drowned in a swimming pool when I found it. That gave me a huge advantage — not only was it not moving, but it was also super clean! (You’d be surprised how many macro shots can be ruined by dirt, hairs etc). Being in such a state it was easy to turn it over for a look at the forcipules. Big eh?
The photos were taken with a 100mm macro lens at f/10, 250th second and using a flash. I always use a long pair of tweezers to manipulate the critter’s pose in situations like these, just in case they come back to life. And the shiny platform it’s on is a dinner plate! I often use dinner plates for shots like these. Just make sure you remove all traces of the centipede before you serve up dinner.
Oh, and one more thing — when you find a critter all limp and soaked in the pool, don’t assume it’s dead. I’ve seen funnel-web spiders come back to life after you would have sworn they’d drowned. And this centipede fully recovered after it dried out too. Like I said earlier, I only ever handle these kinds of things with long tweezers and you should always treat these biteys with a bit of caution.