PAGE 1 | PAGE 2 | PAGE 3 | PAGE 4 | PAGE 5 | PAGE 6 | PAGE 7
December 31, 2013

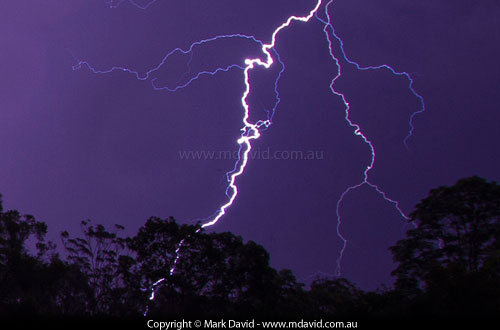
It’s storm season in South-east Queensland. Which provides some great incentive for a new article about how to take night time photos of lightning.
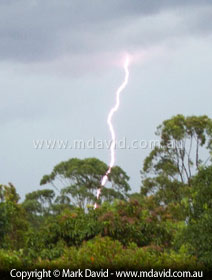
Now, the eagle-eyed readers of these posts will have spotted how specific I was in saying night time photos. The reason is because night time pics of lightning have a totally different technique to daytime shots. You see, night time shots have the advantage of long exposures, so you don’t have to guess when the lightning is going to happen. But in daytime a long exposure will give you a totally blown-out overexposure. Therefore in the daytime you have to time your shot to be at exactly the same moment as the lightning. Easier said than done.

Taking photos of lightning in the daytime then, involves either a nimble shutter button finger, or a device which detects the lightning flashes and responds faster than we can to trigger the camera. I don’t have one of those things but I’ve tried the nimble shutter button finger method and got a few okay shots. Well, they were okay in that they recorded the lightning but not so great artistically. So I’ll leave the daytime lightning photography articles for another time or another website.
December 26, 2013

Can kangaroos swim? No, really. Can they?
December 22, 2013

Not one, but two new photography articles today.
First up, is another one of my primer articles for the folks who are just starting out. This time it’s an introduction to the subject of depth of field. You see, I’ve met some people who confuse depth of field with focus, and although the two things are related, getting their meanings confused is going to make it so much harder to figure out much more from then on. So that’s why I did that new primer.

The other new article goes into my essential basics section. It explains about focusing a modern digital SLR camera. The cameras these days can make focusing quick and easy, but then they go and complicate things by giving you heaps of options if you want to take control over it. And if you don’t take control over it then your quick and easy autofocus is likely to quickly and easily focus on the wrong thing.
So that’s an extra two articles online before Christmas. Have a great season!
December 19, 2013

Lately I’ve been giving personal lessons to people about their SLR cameras, teaching them individually. That works well for the person learning but it also works well for me because it’s giving me some mighty valuable insights into what subjects beginners find confusing. Based on that, I’ve started writing some new articles which I call my primers. They’re written as super-simple guides to clarify the bits acting as stumbling blocks to the folks just starting out.
Understanding these basic things gives you a huge advantage when it comes time to learning the rest of it. Now I’ll point out that the vast majority of people coming to this website won’t need them, but for those folks finding SLR cameras completely alien, then it’s an entirely different matter.
The first primer I wrote was just a general article. This time it’s to help beginners make sense of the different causes of blur.
December 9, 2013
Here’s a new article which most of you photographers won’t have to read. Yep, seriously! But it will hopefully make things a little easier for some.
It’s sort of a “primer” for the people just starting out in digital SLR photography, and who feel a bit confused or even overwhelmed by the complexity of an SLR camera. Even though the information in it is kind of obvious to most photographers, the truth is people who’ve used SLR cameras for years take this knowledge for granted and perhaps forget what it’s like to be lumped with a fancy, complicated SLR for the first time.
So with that in mind, I’ve written this short article. It should help to clarify a few simple concepts so that beginners are better equipped to jump right into the article on getting started in digital SLR photography.
December 3, 2013
When I got my design degree I learned how to work for print. And print is where I’ve spent most of my career.
The thing about print is, once it’s done you can’t unprint it. Unhappy with your choice of typography? Well, that’s just tough because you were stuck with it.
Now everything’s online it’s the opposite. You can change your mind and update your stuff as often as you want. Just overwrite the old files with improved new ones.
And that sums up pretty well what I’ve been doing lately, or perhaps I should say, doing too much of lately. I got tired of how my website looked. So I’ve been updating its appearance. I kept thinking I got it right and I’d live with it for a few days and then upload the changes and then decide I didn’t like it any more so I’d change things again. Changing my mind again and again and again. (You can see why I don’t have a tatoo.)
Anyway, that’s what can happen when you are your own client. You have the client from hell.
Well I’m pretty settled on the look of my site at last so it’s back to adding new stuff. This time it’s about how to make your photo subjects stand out better against their backgrounds. You see, sometimes I look at a photo and I have trouble deciding what the photo is supposed to be of because there are too many distractions in it. That’s fine if the result looks beautiful but if it doesn’t look beautiful and you still can’t decide what the picture is of, then there just has to be a better way, right?
November 15, 2013
I was looking at this website on an iPad and realised it wasn’t working as well on it as it should. So I changed the design of everything to make it work better on a bigger range of screens and devices.
That kept me busy for a while but it’s done now. So I’ve finally had the chance to write a new photography article. This time it’s about how to get as much stuff as possible looking sharp in a photo. This should come in handy for landscape photographers and lots of other people too. For example, if you’ve got the job of taking the team photo of your kid’s footy team it’s going to be a bad look if the only kid in focus is your own! So the very simple rule of thirds which I describe in this article will give you a nice advantage.
October 7, 2013
I was wondering about ways of getting more visitors to my photography articles. For a while there I thought I should rename them The Digital SLR Photography Diet. Yes, I think that would do it. But instead I tinkered around with the introduction on my photography home page. I know I know! I should get busy social networking, making lots of noise on Facebook, Twitter, Google+, Tumblr, Pinterest and all the other ones, and then as well as that make myself known across a bunch of forums and so on.
But to be honest, I’d prefer to just get outside and take some photos.
It’s not like I’ve never tried those social networking things. I was on Facebook for months. And I made a real effort to get into that kind of thing, despite always feeling uncomfortable about their terms of service.
Speaking of things Facebookish, I was wondering. At the time of writing this post, Facebook says in its terms of service that “For content that is covered by intellectual property rights, like photos and videos (IP content), you specifically give us the following permission, subject to your privacy and application settings: you grant us a non-exclusive, transferable, sub-licensable, royalty-free, worldwide license to use any IP content that you post on or in connection with Facebook (IP License).”
So if I post a photo onto Facebook then I agree to them having all those rights over it. The terms state that I still own the intellectual property of my photo, which is great, but I am assigning the rights to its use across to Facebook in the ways I just quoted.
And from what little I know about the law, that makes sense. You see, ownership of something, and the rights to use it, are quite different things. For example, I could lend my bicycle to my neighbour, which means that even though I’m letting him use it, it’s still my bicycle.
But what about all the famous logos and trademarks like the one for the world’s most famous soft-drink for example, that have been posted onto Facebook by the very companies that own them? Does that mean that Facebook now has the non-exclusive, transferable, sub-licensable, royalty-free, worldwide license to use those famous trademarks? Or any of the countless other trademarks and logos from all the other corporations around the world with a presence on Facebook? If Facebook did have those rights then that would be kind of funny, because it would put them in a unique position in the history of intellectual property.
September 17, 2013
You know how jokes are only funny if you don’t know how they end, well I was making minor alterations to my article on megapixels and wrote a bit of a joke into it, but then I had no choice but to delete what I’d just written because I knew how it ended.
September 15, 2013

Huh? Is that really the time? September already?
Okay, it’s not like I’ve been sleeping since April. Far from it and I’m outraged that the thought was even considered. No, I’ve only been sleeping since June. No seriously, the truth is that most weeks this website has been getting at least a few fixes or updates. For example, since April I’ve added a bunch of new articles to both the photography section and the nature stuff but I stopped bothering with mentioning it here because my web stats said these What’s new pages were getting so little traffic.
Not getting much traffic is normally seen as a bad thing, right? But then today I figured it has its good side too. I mean, if hardly anyone is going to see this particular page then I needn’t worry so much about what goes on it. Woohoo!!! You see, that’s a good thing.
Anyway, here’s what I’ve been mainly up to these last months: trying to make my photography articles simpler and easier to follow. I mean, I keep banging on about how easy DSLR photography is and then go and wreck that case by writing hundreds of words explaining anything related to it. It’s not exactly being consistent, is it?
So I’ve been rewriting and cutting and simplifying. A lot. I’ve deleted big chunks of copy that, in hindsight, seemed unnecessary and boring. I’ve been fixing spelling mistakes. Lots of them. And redoing some of my graphics and replacing images with new photos that better illustrate the points I want to make. I think you’ll find that the site is a whole lot better because of it.
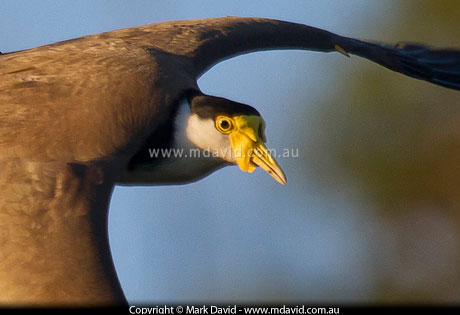
What I want is to make this little website the best place online for beginners and even not-so-much-beginners to make better sense of their digital SLR cameras. Because SLRs are fantastic toys capable of all sorts of cool stuff. Sure, they can be big and clunky and not nearly as convenient to take with you as a smartphone, but just try using a smartphone to take a picture of a Masked Lapwing while it’s swooping you — I’m talking bird-speed warp nine captured in clear focus mid-swoop — and then see if you still think smartphones are all we need.
Sure, in perfect conditions your smartphone can take great shots. Just like how in perfect conditions a 12-inch-long balsa wood model yacht could cross the English Channel. But we don’t always have perfect conditions. And that’s just one of the reasons why SLRs still have their place in photography. Because most of what I do is wildlife photography in anything but perfect conditions I just can’t imagine getting by without an SLR.
Long live the SLR.