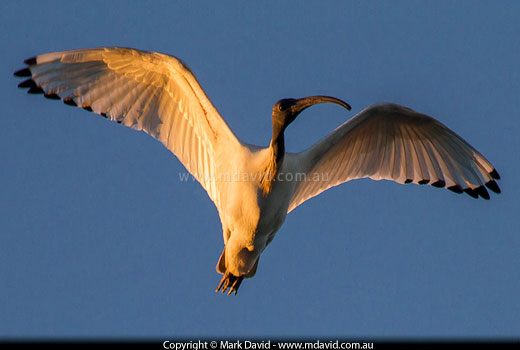
When the best kind of light is hitting your subject from the right direction, then getting good colour into your shots is as easy as pressing the shutter button. But sometimes the light is just plain difficult.
Previous tip | Next tip

The light isn’t always going to cooperate like this. So what would I have done if the light was coming from behind the bird?
If I’m dealing with really bad backlighting then I normally use a flash. Even in broad daylight. That way, the part of the photo subject I’m seeing gets lit up enough for me to see its colours.
But sometimes your subject is just too far away for your flash. What do you do then?
Fortunately for us, there’s a thing called exposure compensation and I’m telling you right now, exposure compensation is your friend. What it does is to tell your camera to make things brighter or darker than it wants to.
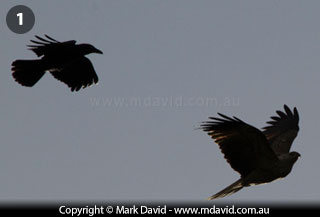
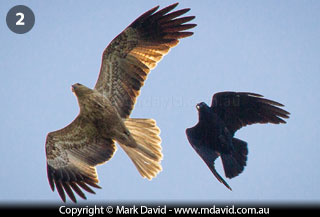
I’ll give you an example. A Whistling Kite was being chased by a Torresian Crow and all the action was happening right in front of the blinding late-afternoon sun. The glare was so bright I couldn’t even look into the viewfinder most of the time. Using the default camera settings, the camera wouldn’t have understood that the sky should be that bright and so it would have made everything darker, including the birds. The result would be image shown below left.


1: The automatic exposure settings produced a badly under-exposed photo. 2: Exposure compensation made the next picture come out brighter.
But it was easy to fix. All I had to do was to use +2 stops of exposure compensation (a positive number makes photos brighter, to turn my silhouettes back into coloured objects again) and my camera was suddenly able to ‘see’ some details in the birds against that bright sky.

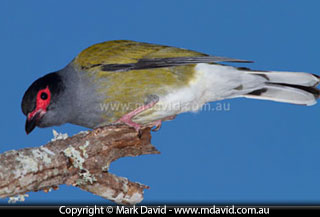
This Australasian Figbird was silhouetted against a bright blue sky, but I was able to reach it with the light from my flash.
So if you haven’t played with the exposure compensation feature of your camera yet, then maybe it’s time to check it out.


