
You hear a lot of talk about resolution in photography. For example, there are the resolutions of your image, your screen and your printer. Here’s what that stuff means and how they all relate to each other.
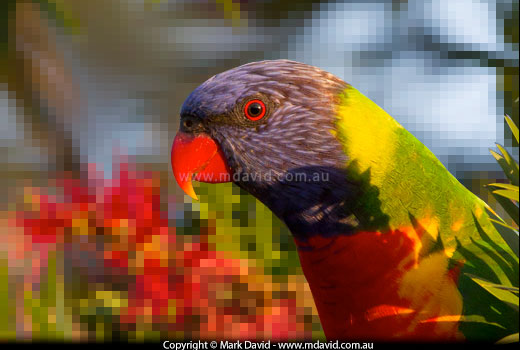
A high-resolution Rainbow Lorikeet in a low-resolution world
First of all, a rough definition
Digital pictures are made up of pixels. Pixels are the smallest element in an image. Seen right up close, they are little squares filled with a single colour, but from a normal viewing distance on a screen they merge to create the appearance of your photo.
Resolution is the word we use to describe the level of pixel detail in an image. If an image is made up of zillions of pixels then it’s considered a high-resolution image. And it makes sense that the more pixels there are in the image (the higher the resolution) the bigger its file size, because the data in the file has to keep track of and describe more pixels.
We call those little things pixels because that’s the word we use when we’re showing an image on screen, but when we print an image on paper we suddenly start talking about dots of ink, so that’s when we change the term to ‘dots’.
Just like how the word ‘resolution’ has subtle differences in meaning when we use it in different contexts, the resolution settings themselves can be different too, even while we’re working on the same image. So it helps to know what’s going on.
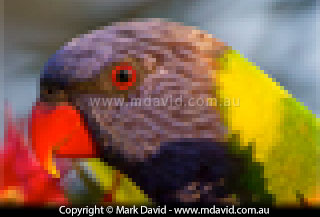
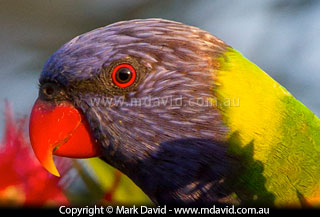
When the resolution of your image is so low that you can see the individual pixels (first image), then the quality of the image is likely to suffer. The next version is of higher resolution and so it looks better.
Screen resolution
You only have to look around an electronics store to realise screens come in different sizes. But screens of different sizes sometimes still have the same resolution.
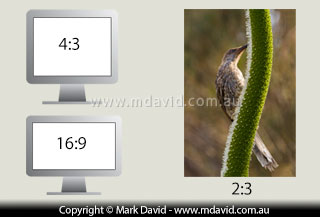
Screens come in different ratios of width to height, and so do images.
Screens (or monitors, or displays or whatever else you want to call them) create images by putting coloured light into tiny spots on the screen which we, once again, call pixels. A typical computer screen would once have measured 1024 pixels across and 768 pixels deep, although those numbers might seem a bit small now, since better (bigger) screens started to come down in price. Of course, if a screen has more pixels it’s said to have higher resolution.
Let’s say for example, that a screen has 1024 × 768 pixels. Depending on how big those individual pixels are and how tightly they line up in rows alongside each other, the screens themselves can be made bigger or smaller. But as long as they are all 1024 × 768 pixels then they are all still considered to be the same resolution.
Image resolution
Digital photos are made up of pixels too. Which makes sense, since the word pixel itself simply means a picture element. You can think of an image pixel as being the smallest possible element in a picture. And you can get an idea of how many pixels make up a digital photo by its size expressed in megapixels. Since a megapixel equals one million pixels, then a 10-megapixel image will be made up of about ten million pixels. My previous camera created 10-megapixel photos and sure enough, the images measured 3,888 × 2,592 pixels in size. Which is 10,077,696 pixels — close enough to ten million.
Putting your photo onto a screen
So we’ve got screen resolution and image resolution. In a perfect world they’d always be the same. We’d have screens with 3,888 pixels across and 2,592 pixels deep so I could see my 10-megapixel photos looking their best. But there’s an infinite number of potential image sizes and only a limited number of screen sizes on the market. So screens need to be able to show any image we throw at them.
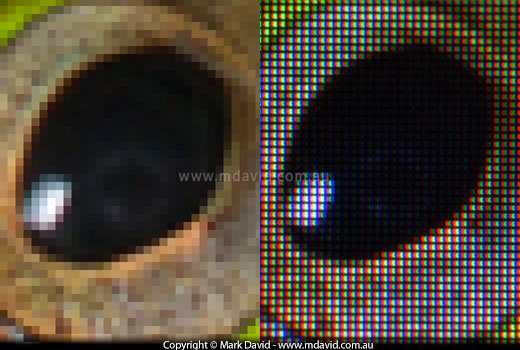
Left: A magnified view of part of a digital image, and right: the screen it’s appearing on. In this instance there is one image pixel per screen pixel. When this happens, we say the image is being viewed on-screen at ‘100 percent’.
Percentages
Let’s imagine your photo measures twice as many pixels horizontally as your monitor, and twice as many pixels vertically as your monitor.
If you open the file in an image editing program like Adobe Photoshop, you’ll have different ways of looking at it.
If you want, you can view the picture full-size (100% resolution). When you do that, each pixel in your image is given one pixel on your screen. Well, at least it does until your screen runs out of pixels. So what happens in this case is you only see a half of the width of the image and a half of the depth. In other words, you only see one quarter of the image.
You might be okay with that, or maybe you want to see the whole photo. Since your monitor can’t increase its physical number of screen pixels then each pixel on the screen is going to have to display 4 image pixels at once (two pixels horizontally and two pixels vertically) in order to fit the whole photo inside the display. Now, a pixel can only light up in the one colour at a time, so what it does is only display a quarter of the total number of image pixels in order to get them into the screen. When you sit back and admire the result, it looks very much the same as your original photo, except it takes up only half the original screen width and half the original screen depth. Or in other words, it now fits.
It’s important to understand that it’s still the same file. You haven’t done anything to it. All you’ve changed is the way you’re looking at it.
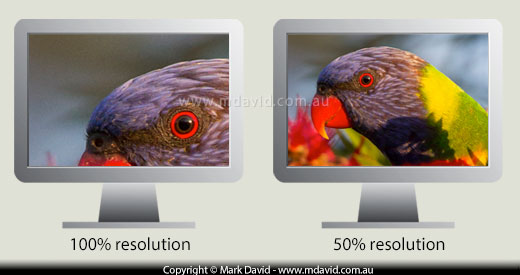
When we view an image at 50% resolution we no longer see every single image pixel on screen but we can get to see the image displayed at half size.
And since the image is now displayed at 50% of its true width (and 50% of its true depth too of course) then we say the image is being seen at 50% resolution. The diagram above shows a very large photo being reduced to 50% resolution.
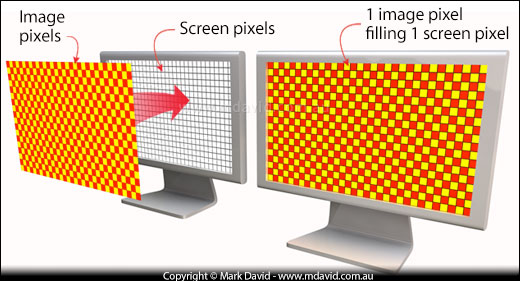
When an image is shown at 100% resolution on a screen, each image pixel is assigned to its own screen pixel. Of course, in this illustration I’m drawing the pixels really, really big, to help you see what’s happening. In real life the pixels would be tiny.
Likewise, if we want to zoom in on our image, we can get our screen to display, for example, one image pixel in each of 4 screen pixels. That will make the photo look twice as wide (and twice as deep) again as our original too-big image. And so we say we are seeing it at 200% resolution. At that resolution it often becomes possible to see the individual image pixels, since they are now displayed as big as 4 screen pixels, which is big enough for the naked eye to see.
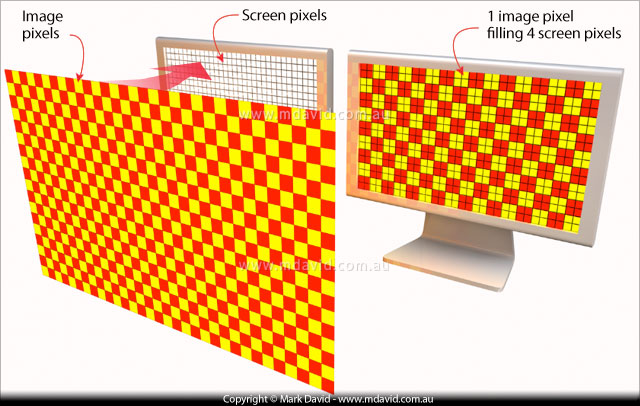
When an image is shown at 200% resolution, each image pixel takes up a square of two screen pixels horizontally by 2 screen pixels vertically, so the image looks twice as wide and twice as tall. This might mean you don’t get to see the whole image.
Changing the image size
With modern digital cameras offering pictures up to 20 megapixels or more, I’m finding that most of the time the resulting files are just too big to work with comfortably. I talk more about the bizarre quest for ever more megapixels here, by the way.
Files with too many pixels are cumbersome to work with. Sometimes they can cause printers to crash and they slow down your computer too by taking up all of your computer’s memory. So how do you make your files smaller?
What you do is use your image editing software to change the image size.
I mentioned earlier that viewing the image on-screen at say, 50% will make it look smaller but it’s doing nothing destructive to the actual file. You can always see all its pixels again by viewing it at 100% again. But when you change the file’s image size you can be transforming the actual document in a way that can’t be fully undone later.
So it’s important to understand what changing the image size does.
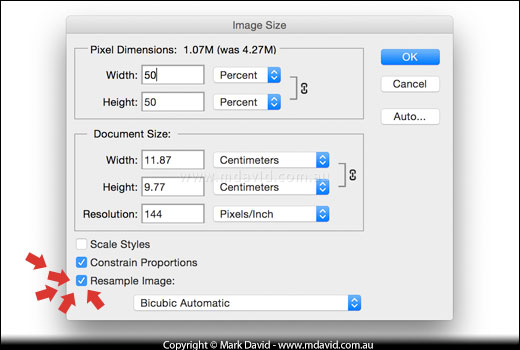
The screen grab I’m showing here is from Adobe Photoshop but the same general rule applies to other software too. If you change the image size and at the same time you choose the option to resample the image — I’m pretty confident you’ll see where I’ve highlighted that setting — then what you’ll do is to permanently change the image.
In this instance I’m choosing to reduce the image size to 50%. Once you click OK then the software will throw away 75% of the pixels in the image to make it 50% less wide and 50% less tall. That’s what that ‘Resample’ thing is doing: it’s rebuilding the image using a smaller number of pixels.
When you throw away those pixels you are reducing resolution, and paying a price in image quality. The reason why we do it, is because we often just don’t need or are able to make use of all that original image quality and resolution in the first place. After all, I rarely personally need my photos to be 10 megapixels in size. But what if you change your mind the next day, and decide you want to restore your image to its original resolution?
Well, the bad news is, those pixels that were thrown away are the kind of information that you will almost never be able to recreate. So if you go back later and ask the software to take it back to the original size by entering 200% in that image size dialogue box, then the image will go back to its earlier size but there will be a noticeable loss of quality in the image.
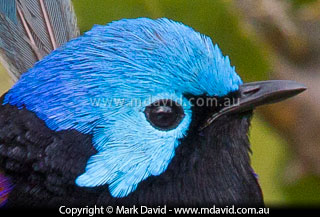
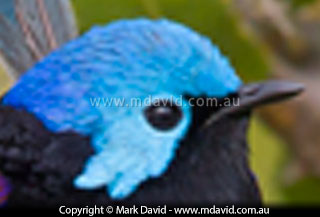
Before and after: a typical example of the kind of image degradation you can get by playing with ‘image size’ settings too much.
Have a look at the detail from the photo above (of a Variegated Fairy-wren) to see this happening. In the image above left we see the starting point. Then I reduced the image to 25% image size and then back up to its original size again by taking the shrunken file up 400%. The software has tried really hard to restore the image to how it looked originally but it’s not doing a great job is it? And to be honest, that’s not the fault of the software. It’s simply the kind of thing that can happen if you muck around too much with image size.
You’ll also see some image degradation if you make the image bigger and then shrink it back down again, but not nearly as much degradation as that first example. Because you would not have thrown away nearly as much of the most important pixel information if you do the changes in that order.
Print resolution
If only that was where it ended. But this is computers we’re talking about now, and nothing seems to ever end with computers!
Okay, so we have our image and now we want to print it.
For complicated reasons, our eyes are better at making out fine pixel detail in print than on screen. I use a rough rule which says that resolution in print has to be at least twice as high as it does for viewing on a screen. That’s why website images can look just fine on screen and then look just awful when you print the web page. Most of the text will print nice and crisp because your printer software treats type differently. But your images will fall back on whatever their resolution is, which for websites is usually something like 72 or 100 pixels per inch. That’s not enough to make a photo look good on paper. Because when printing photos, you want the resolution to be more like 150 or 200 dots per inch. See? The print numbers are about double the web numbers.
Dots per inch
I’ll go back to that hypothetical perfect world where all our images were in the same resolution as our printers. So, imagine a printer working at 300 dots per inch with an image saved at 300 pixels per inch.
Let’s look again at those last numbers. If your image was 3,000 pixels wide, and you printed it at 300 dots per inch, then it should print (3,000 ÷ 300) inches wide. Which of course is 10 inches wide.
It wasn’t by accident that I used the example of 300 dots per inch, because that’s the resolution that experts say makes the dots so small and close together, that our eyes just can’t see them any more. Instead, the eye just sees a continuous tone or gradient of tones.
That means, if your image is saved and printed as 600 pixels per inch, and even if you could print it at 600 dots per inch, it wouldn’t look any better. Your human eyes wouldn’t be able to see any improvement. You’d just have a bigger file, or the same-sized file printing at half the size. So there’s no advantage there.
Inkjet printers
Some inkjet printers advertise themselves as being able to print at very high resolutions, way in excess of 300 dots per inch. But they do that because they use a different type of technology to print and also to determine resolution, which results in those big numbers. I’m not complaining about inkjet printers though. Because when you use them properly their results can be fantastic.
What image resolution do you need to make things look good in print?
It depends on the quality of your paper and also your printer. If you’re printing on regular paper like the stuff you use in a photocopier, then 150 pixels per inch image resolution is fine, and probably about as much as that absorbent paper can handle. Once image resolution starts to fall below about 100 pixels per inch you start noticing it looking a bit fuzzy. This only applies to images of course, because typefaces (except type that is part of an image file) should look good without having to even think about resolution.
If you want to print a photo on glossy paper, then saving your image with a resolution of about 200 pixels per inch is fine, or up to 300 pixels per inch if you are going for maximum quality (although it won’t look hugely different to 200 pixels per inch). If your printer is trying to expand the image to fill the page then that will have the same effect as using a smaller image resolution, but if you’re working with big files like 10-megapixel photos then it’s more likely that your printer will be needing to scale the picture down not up to fit the page.
So, how big will a 10-megapixel photo print?
I answer that question in detail in my article about megapixels.


