Which is the best option for how your camera takes pictures? There’s JPG.
There’s RAW. And then there’s JPG plus RAW. I tell you how I like
to work, and my reasons why.

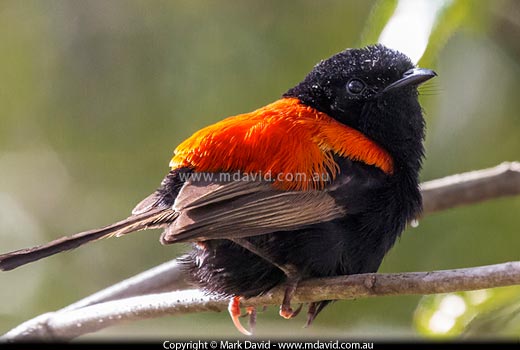
Taken using a RAW workflow, I was able to squeeze a little
bit of extra detail and colour out of this photo of a Red-backed Fairy Wren.
First of all, what’s RAW?
When a digital camera takes an exposure, it’s faced with a lot of decisions
about how to turn a whole pile of data into a nice-looking thing which we call a photo.
That great big pile of data pretty much sums up what your RAW file is.
If you decide to shoot in JPG mode, then your camera makes those decisions, based
on a bunch of settings, and then creates a picture out of it. Then it saves that
picture as a JPG and throws away all of that original data. Things like colour temperature, noise
reduction and even (to some extent) exposure are locked in. And there’s no way
to recover that stuff that was thrown away. Sure, if you don’t like how the JPG
turned out you can always modify it in software like Adobe Photoshop, but there’s
a limit to what even that software can do.
So wouldn’t it be good if we could keep our options, and all our captured
image data, for later? Just in case you want to change something.
That’s what RAW is. It’s the use — and the preservation
— of the camera’s original image data, instead of just the processed
end-result. That RAW file is just a pile of numbers and code which only your camera
and special software can understand. It’s not a photo just yet.

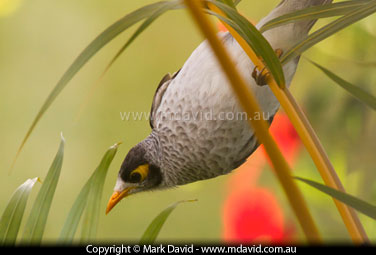
This Noisy Miner was photographed through a heavy glass door
that badly changed the colour temperature. Fixing it was easy because of the
flexibility offered by working RAW.
RAW processing software
Chances are, when you bought your digital SLR it came with some software that
allows you to process its RAW photos. Many people do just fine with that. However there
are some excellent third-party software packages that you might prefer. I use Adobe
Lightroom. I have friends who love Apple’s Aperture software too, but unfortunately
Apple has decided not to continue with it. There’s also the Camera Raw
plug-in which allows you to do RAW processing in Adobe Photoshop. The
cool thing is that some of these packages offer demo versions, so you can try them out
before making up your mind about whether you want to buy one.
Camera options
RAW plus JPG
Can’t make up your mind about which way to work? Well, lots of cameras allow you
to create both formats at the same time. So you choose to create RAW as well as JPG files
in your camera while you shoot. I prefer not to use this option because I think it’s
just making extra files but if you currently lack the ability to process your RAW files
then this is a great way of having both options — JPG for now and your RAW files
saved for a later date if/when your software receives an update that enables it to
open them.
JPG
This option creates a picture out of the raw image data, locks in a bunch of
settings while it does that, then throws away whatever image data the camera
decides it doesn’t need. Then it saves the picture as a JPG file.
RAW
This is my preferred way of working. I can still preview my pictures on the screen
on the back of my camera and then I can do a lot with them in my processing software.
Workflow
After I take my shots I download them directly into my RAW processing software. It
presents me with a bunch of large thumbnails of the images.
Thumbnails
One of the handy things about thumbnails is that if an image looks good when it’s that small, then
it’s much more likely to be a great shot when seen at full size. That’s because
when a picture is in thumbnail size all you can see are the important things like colour
and composition. So the thumbnail view is serving a bonus purpose in helping you choose your best pics.
Processing
In my opinion, the less work you do after you take a shot, the better it’s likely
to turn out. If the light was beautiful when you took the photo and you didn’t muck
anything up, then you won’t be asking your RAW processor to do much.
However many shots, including a lot that I take, benefit from a small amount
of tweaking. I describe those things, and the order in which I do them, in my
article about editing.
Exporting
The last stage of the workflow is exporting the photos. With the processing done,
I export the result as a JPG file for storing in my folder of photos. My settings for
export are as a JPG, at 300 dots per inch. 300 dots per inch is overkill for most things
but some printers like to have files of that resolution.
For colour space I have my entire workflow — from camera through to printed
output — set for Adobe RGB (1998). However sRGB could well be a better choice
because it has become more friendly to a lot of devices and printers so if you really
must make a choice then sRGB would be best for most people. I won’t explain
colour spaces and that whole crazy subject of colour management because it’s
very complicated and although I have it working really well for me, I don’t
think I’d be able to explain it properly yet. Most people I know don’t
even use colour management in their workflow and they seem to do just fine.
Beginners versus the experts
Some people think RAW is just another complicated thing that should be left to the
experts. But in my opinion, it’s the beginners who have the most to gain
from working RAW. Here’s why:
Not only is RAW more forgiving if you want to make changes later, but if you
improve your skill levels and the quality of your equipment later you might be extra
glad that you saved all your images as RAW files. Sure, if you’re an expert then can you work in JPG mode because
all your settings are likely to be correct from the very beginning, but when I was
starting out I made a lot of mistakes. And I still make some mistakes. RAW gives me
the option to go back, years later, and with the benefit of having access to all the original
data I can resurrect photos which I originally didn’t think were any good.
Personal preference
Like most things, how you work will come down to a personal preference. You might
read all my arguments about RAW and then still go ahead and only shoot JPG. That’s
fine. When you start getting into digital photography, sometimes you just don’t want to
think about having to learn more and more new stuff. Because the more time you’re
learning technical stuff, the less time you’re concentrating on taking beautiful
photos.
Of course, one alternative is that you try shooting in RAW-plus-JPG mode and then
see if you can use some RAW processing software to produce a better result than the JPG!
But seriously, I’m telling you how I like to work. How you do things is up to you.

