
With Photoshop you can get this effect in seconds.
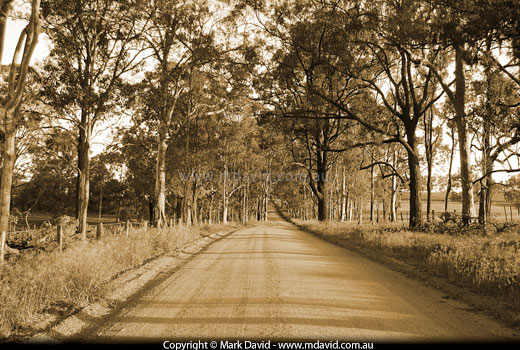
The sepia effect is a great way of making your photos look old.
Sometimes it can be a nice trick to make your photos look like they were taken a hundred years ago. Just off the top of my head, I can think of two ways to get this effect:
- Take the photo a hundred years ago
- or do it with software.
I’m a big fan of the second method. Now, I don’t know enough about all the types of image editing software to tell you how many kinds of software can do this trick, but I’d be extremely surprised if there weren’t lots of options. For example, GraphicConverter by Lemke Software makes it even easier and at the end of this article I describe how (in one sentence).
So your way of doing it might differ a little from mine, but here’s how I go about it in Adobe Photoshop.
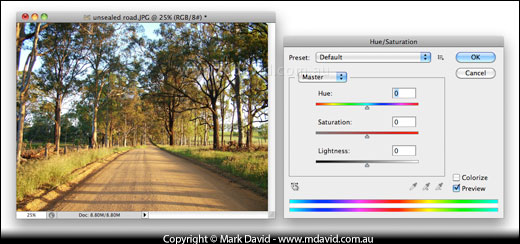
Open your photo in Photoshop and go to the Image menu at the top of the screen and select Adjustments > Hue/Saturation…. You’ll get a Hue/Saturation dialogue box like the one shown here.
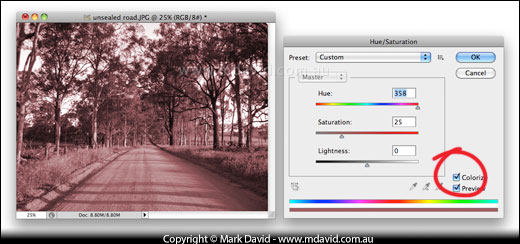
Click on the little button where it says Colorize. I also recommend having the Preview option checked so you can see what you’re doing.
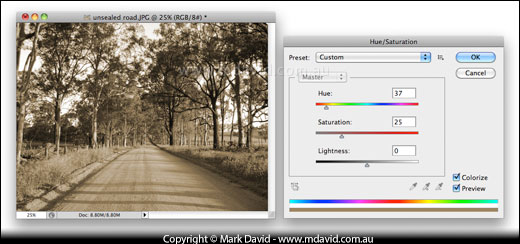
Drag the Hue slider to the point that you think gives your picture a nice sepia colour.
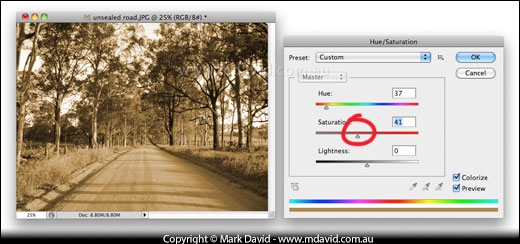
Now drag the Saturation slider to where you think the colours are rich enough.
And that’s it. It’s done! You can click on the OK button to make your change.
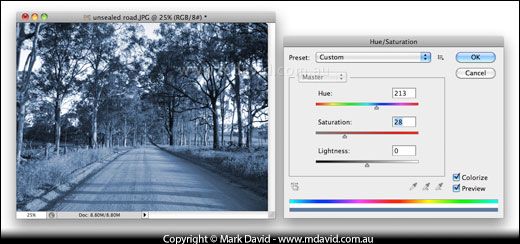
You’re not limited to just sepia either. You can drag that Hue slider to any point you think makes your image look the best.
How it’s done in GraphicConverter
You don’t need Photoshop to get this effect. GraphicConverter is just one example of an alternative. In fact, it’s even easier in GraphicConverter! Just open your image and go to the Picture menu and select Colors > Change to Sepia. It doesn’t get much easier than that.


