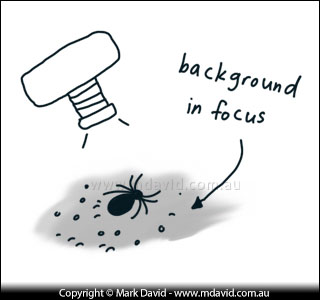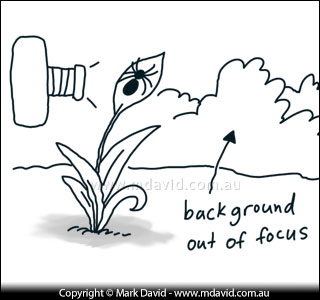
In this next drawing the background is, well, in the background. Because it’s
difficult enough to get a whole bug in focus, then something a few feet away or further is
going to be reduced to nothing more than a massive smudge. So look for opportunities
to put some distance between the subject and its background. That can often come
from simply photographing it from a different angle.
Black background
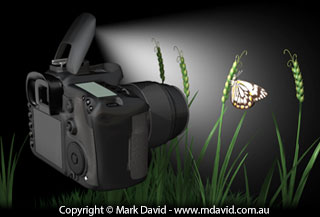
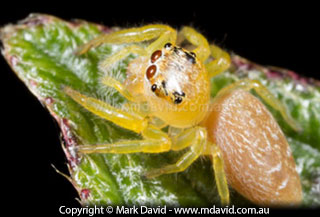
When you combine f/16 and 250th second, everything except those objects
within reach of the flash will probably be underexposed. The photo of the jumping spider, taken in
broad daylight, is an example of that.
Okay, so you’ve got the background separated out from your subject, but it’s gone
black. What’s happening?
The problem is that the flash is only throwing enough light to illuminate your subject.
The rest of the shot is being badly underexposed by your manually selected settings of
250th second at f/16. If the flash had been bright enough to illuminate the background,
then your subject up close would be badly blown out (overexposured).
Tripod
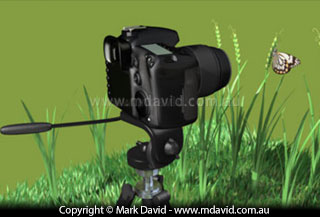
Putting the camera on a tripod will allow you to keep that f/16 aperture
for your depth of field, while also having a much slower shutter speed to expose the whole
scene better and more evenly.
Using a tripod lets you go back to the kind of shutter speed necessary to get the background
properly exposed while still keeping that small f/16 aperture for your depth of field.
Okay, we might not want the background to be in focus, but we might not want all
your photos to look like they were taken at night either.
Here’s your chance to find a nice, even background that is lit front-on with good
light. In such ideal conditions as this you might be able to get away with hand-held shots but
otherwise your camera will find this new setup more to its liking.
At this point I’ll add that when it comes to buying a tripod then I think
it’s worth getting a good one. Your tripod will probably be with you for much
longer than your camera body.
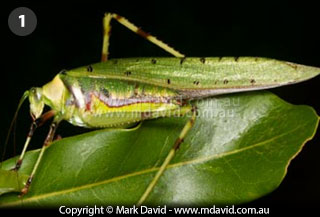
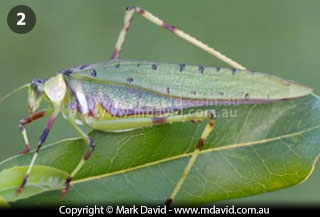
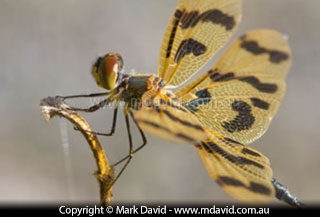
Both of these shots were taken in the middle of the day. Picture 1
was taken with a flash and Picture 2 using nothing but natural light.
Note the black (underexposed) background in the picture taken with a flash.
Not using the flash
Keep your aperture at about f/16 and turn off your flash. And you don’t need
to be in manual mode any more. Switch to aperture priority mode (or whatever your
brand of camera calls it) and allow your camera to choose the right shutter speed for
the shot. Your background will still be blurred, but it will no longer come out black.
Getting the camera down at the critter’s level will often put
the background into the distance, blurring the background so much that it no longer competes
with the subject. This is a trick which works with other types of photography too.
This is where the beautiful patches of light to be found first thing in the morning
or very late in the afternoon can produce wonderful macro photography, due to the light’s
rich golden quality. And since the bugs are colder they won’t move as quickly. I
personally believe natural light is the most beautiful.
Camera vibration
I said earlier that when you’re taking macro shots, the slightest camera shake can
produce a blurred shot. That becomes even more noticeable with longer exposures. Okay,
you’re using a tripod to help keep things still, but the mechanical bits of the
camera can cause some vibration too. That’s why I use a cable release.
Cable release
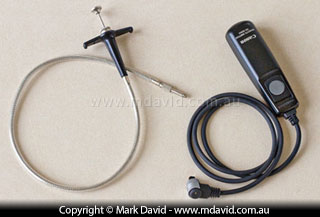
Cable releases. Make sure you use the right type for your camera.
A cable release will prevent your trigger finger from shaking the camera. But if you
don’t have a cable release, you also have the option of using a delayed (timer)
exposure. Chances are your camera will allow you to expose the shot some seconds after
you touch the shutter button, allowing the camera time to stop vibrating.
Live view mode
A lot of the newer digital SLRs have a feature called live view mode. What that means is,
you compose your image on the screen on the camera rather than by looking through the
viewfinder. I think it’s a matter of preference as to how you like to work, and LCD
screens can be difficult to see properly in daylight. But live view mode can often allow you
to ‘zoom in’ on part of the subject to check small areas of focus and so that that
can come in mighty handy for fine macro work.
Ugly backgrounds
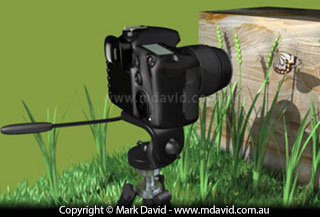
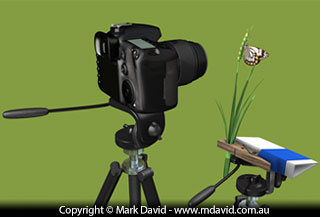
Sometimes the background is correctly exposed but also just plain ugly. Using a
second tripod to hold your subject allows you to move it to some place where it’s not a problem.
Here’s where we can be a bit sneaky. You’ll see in the first picture you
can sometimes you get a really ugly background behind your subject. Now, in the
first article I talked about the importance of having a
good tripod. Before I got my good tripod I had a really cheap, lightweight tripod. I found
out that the cheap tripod was worse then useless for holding a camera because the
slightest breeze would make the camera wobble. But it turned out to be perfect for holding
something as light as a grass stem with a bug on it!
So what I do, is to use the lightweight tripod to hold my photo subject. If you carefully
cut off the leaf holding your insect then you can use a cheap, lightweight tripod to hold
the leaf in front of your ideal (distant) background. That’s what I’m illustrating
in the next graphic (at right.) This time, everything is just where I want it. I won’t
pretend I invented this trick. A lot of the experts use methods like this.
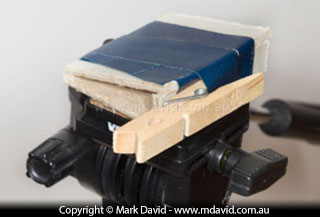
This clothes-peg thing sitting on top of the old tripod cost me
nothing, but does a great job at holding plant stems in front of my macro setup.
If you want, you can buy clever thingies that turn the head of a tripod into something that
holds a clamp, but you can save some money by doing it yourself. Some of the best professional
photographers I know solve problems with tape and wire and cardboard instead of spending more money.
In the picture at right I show you the result of a few minutes playing with some stuff
lying around the house. You’ll see that it’s just some cardboard, tape and a
clothes peg mounted on top of the old tripod. The screw which normally
holds a camera onto the tripod screws into the cardboard instead and that clothes peg holds the
plant stem. And because it’s sitting on a camera tripod head, I can make it go up or down
or rotate it or whatever I want.
It would be possible to write entire books about macro photography, and of course lots of
photographers have done just that. There are heaps of techniques and tricks that will
enhance your work and this series just doesn’t have time for all of them.
So consider this as just a start. If you follow some of the things I’m talking about
you should hopefully be improving your ratio of macro keepers. Now you just have to go
hunting for some interesting bugs.

